
Managing Users
Admins can manage user accounts by creating, deleting, blocking, and unblocking accounts. Admins can also grant access to users and cancel invitations.
Every action on this page can also be done without code, from the Users page of your project in the Skapi dashboard. You are the project owner there, so the owner's rules on this page apply.
An AI agent can do it for you as well. The Skapi MCP server searches users, creates accounts, grants access groups, updates profiles, and blocks, unblocks and deletes accounts from a prompt, for the project owner and for admins of the project, under the same rules. See Connecting the Skapi MCP server.
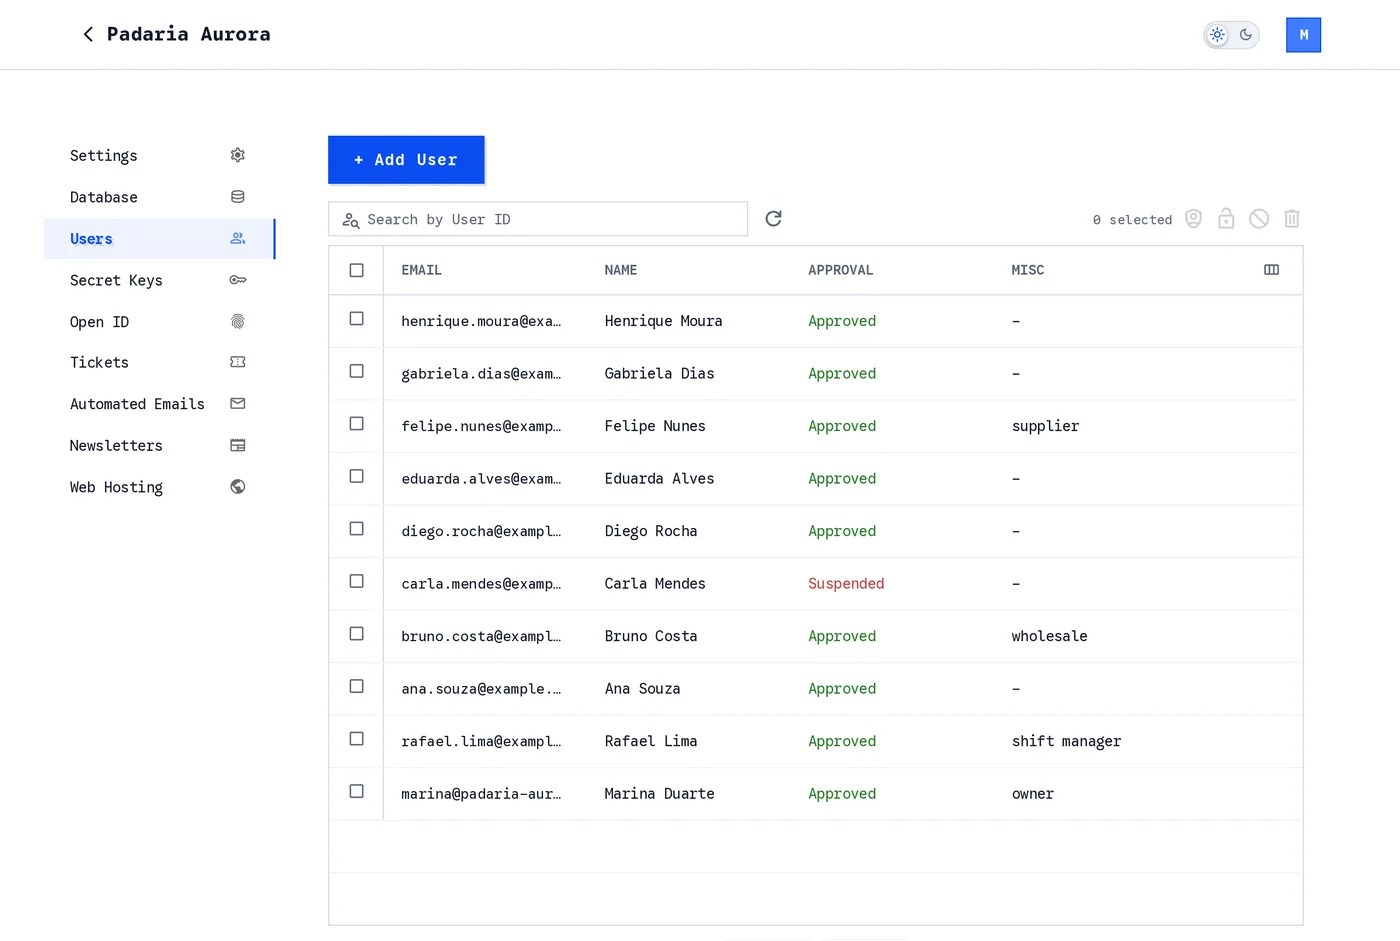
The Users page. Tick accounts with the checkboxes, then use the icons at the top right of the table: Grant access, Unblock users, Block users and Delete users. Clicking a row opens the account's own form.
Assigning Access Group to Users
Users that have admin access can grant access to other users by using the grantAccess() method.
This example demonstrates using the grantAccess() method to grant access to a user.
When the request is successful, the string "SUCCESS: Access has been granted to the user." is returned.
You can grant user access group levels from 1 to 99.
Access groups 90 and above are admins, and 'admin' is accepted as a name for 99, the group that is exempt from the access group rules on this page. See Roles.
An admin cannot grant an access group higher than their own: an admin in access group 95 can grant up to 95, and the request fails with Cannot grant an access group higher than your own. otherwise. The project owner has no such limit.
An admin in access group 99 cannot be expelled by a lower admin: only another access group 99 admin or the project owner can change their access group. Anyone else gets No access to expel admin.
An admin in access groups 90 ~ 98 also cannot change the access group of an account that is already in the same access group as their own or a higher one. That request is refused with INVALID_REQUEST and No access to modify admin., and nothing is changed. Admins in access group 99 and the project owner are not limited by it. See The rank rule.
The account must be usable, too: a blocked account is refused with Cannot grant access to suspended user., and an account that has not confirmed its signup with User signup is not confirmed. You cannot change your own access group: User cannot self grant access.
<form onsubmit="skapi.grantAccess(event).then(response => console.log(response))">
    <input name="user_id" placeholder="User ID" required/>
    <input name="access_group" placeholder="Access Group" required/>
    <input type="submit" value="Grant Access" />
</form>skapi.grantAccess(
{
user_id: 'user_id',
access_group: 1
},
).then(response => {
console.log(response);
/*
Returns:
"SUCCESS: Access has been granted to the user."
*/
});In the dashboard
Open the Users page, tick the accounts to change, and click the Grant access icon at the top right of the table. Enter the access group, from 1 to 99, and click Grant. Every selected account gets the same group.
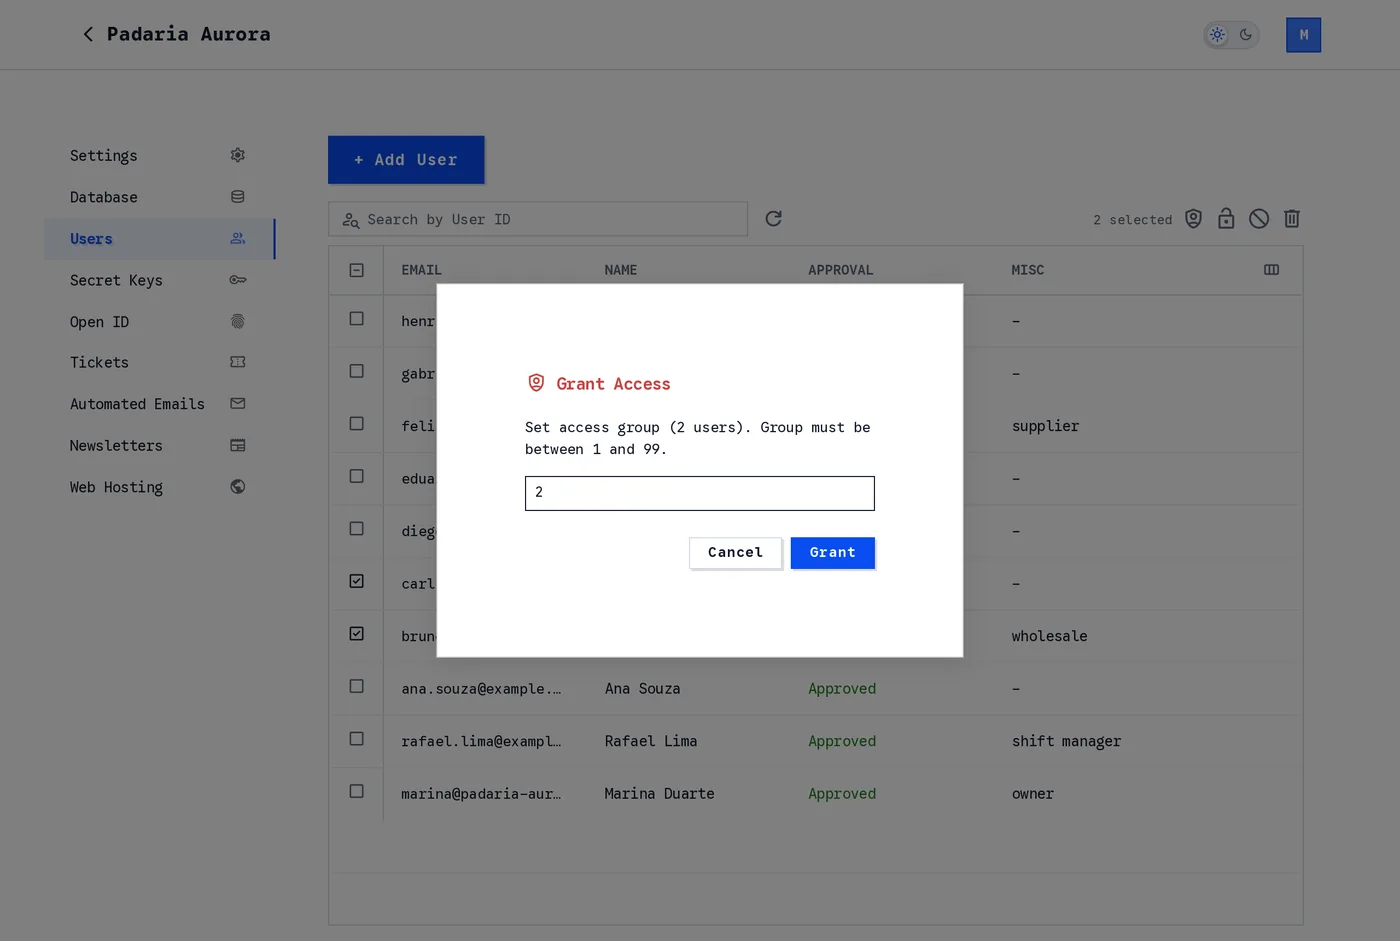
Grant Access sets one access group on every selected account.
To change one account, click its row instead. The Access section of the form has an Access Group field, from 0 to 99. Change it and click Update.
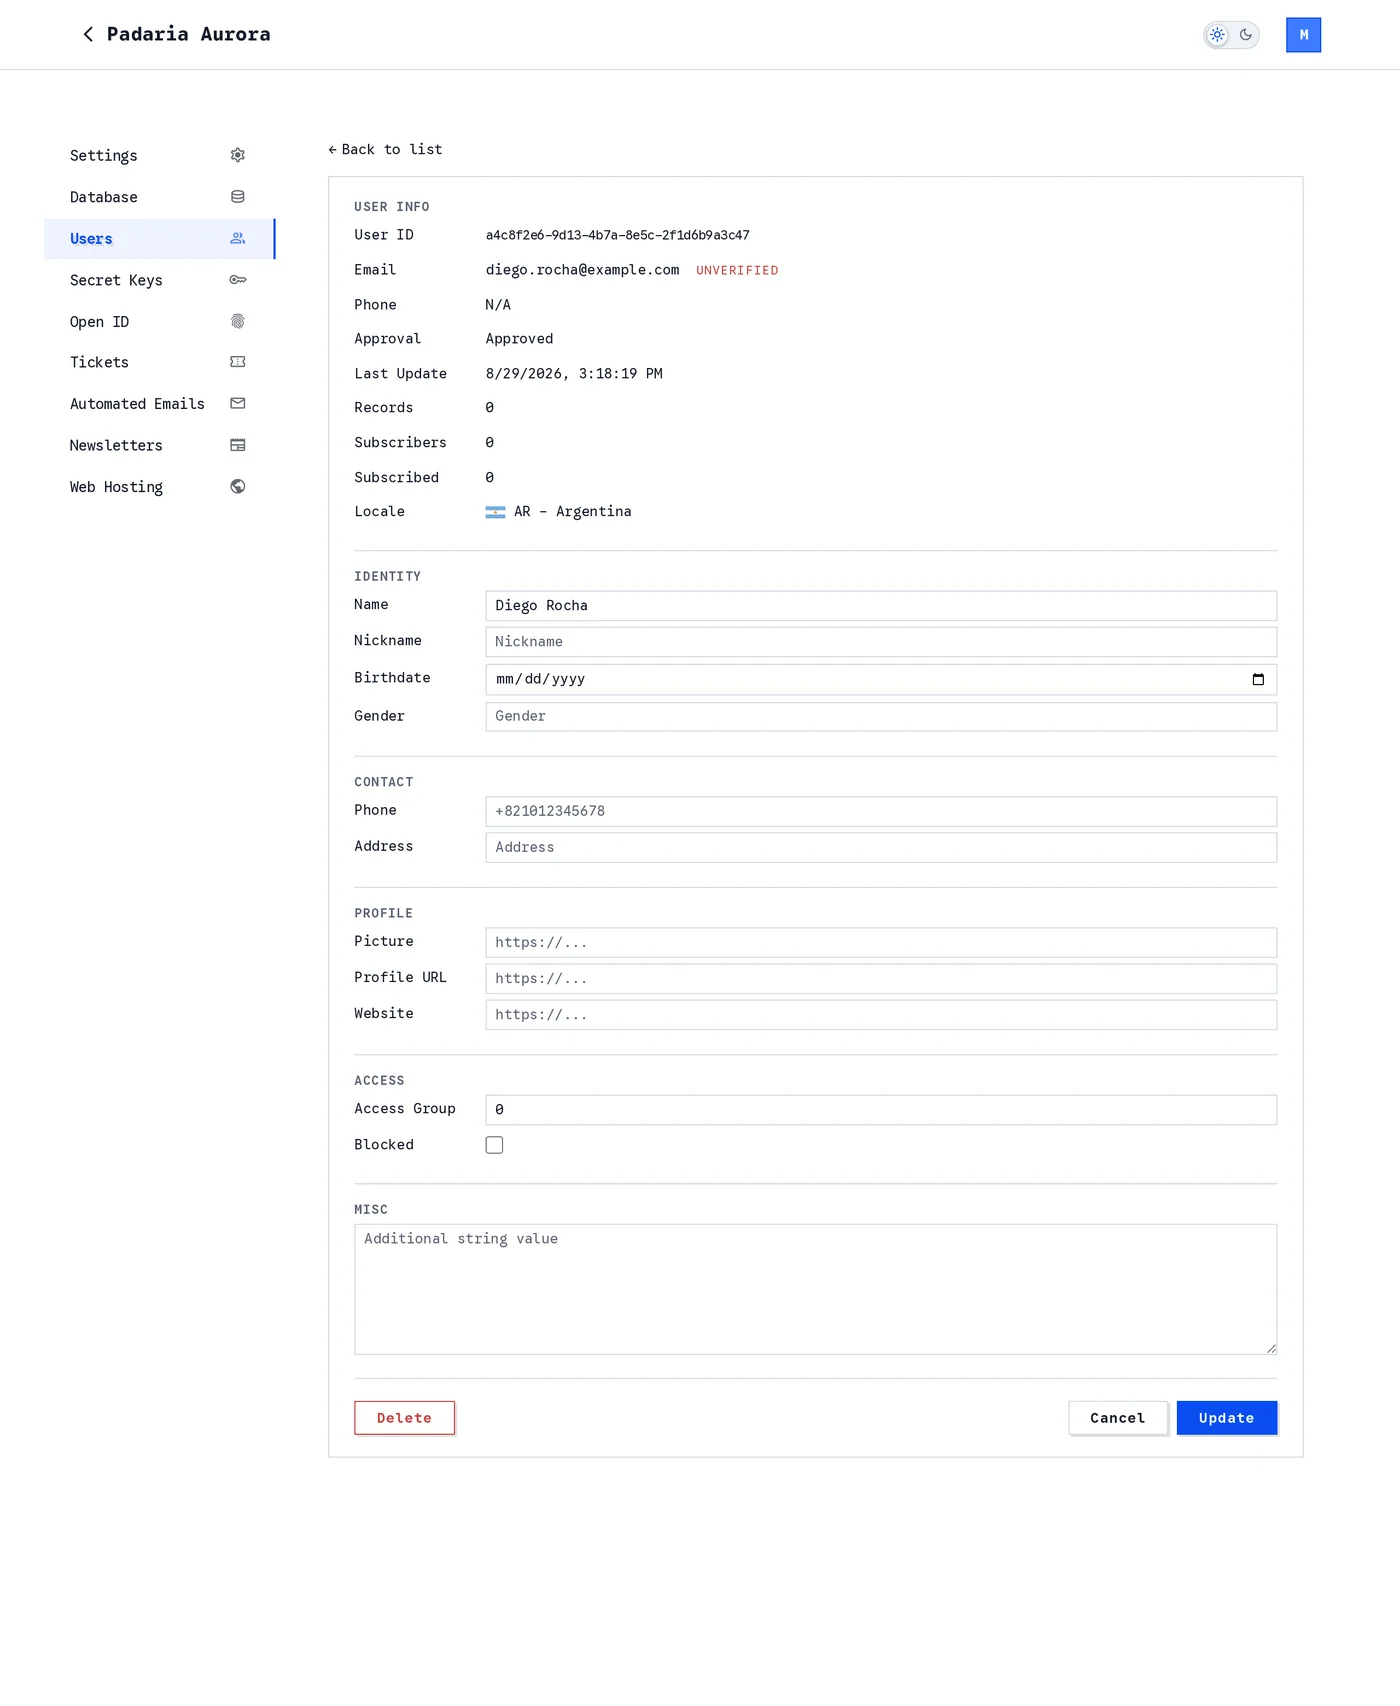
An account's form. Access Group and Blocked sit in the Access section, and Delete is at the bottom.
Creating User Accounts
Admins can create user accounts by using the createAccount() method.
This example demonstrates using the createAccount() method to create a user account.
You should provide the user's email and password. Other user attributes are optional.
<form onsubmit="skapi.createAccount(event).then(response => console.log(response))">
    <input name="email" placeholder="E-Mail" required/>
    <input name="password" placeholder="Password" required/>
    <input name="name" placeholder="Name"/>
    <input type="submit" value="Create Account" />
</form>skapi.createAccount(
{
email: 'user@email',
password: 'password',
name: 'User Name'
},
).then(response => {
console.log(response);
/*
Returns:
The created user's profile object (UserProfile & { email_admin: string; username: string }).
*/
});When the request is successful, the created user's profile object (UserProfile & { email_admin: string; username: string }) is returned.
And the user will be able to log in with the created email and password right away, when you create the account without a username: that address is then the account's own login ID.
createAccount() method does not require any confirmation from the user.
If you pass a username, it is the account's permanent login ID and cannot be changed later. The account logs in with that username right away, and with its email only once that address is verified.
An account created with a username has no email login yet
createAccount() does not verify the email address, whoever creates the account. So an account you create with a username logs in with that username alone until the user verifies the address with verifyEmail(), and email login then starts a few seconds later, on the account's next token. An account created without a username is unaffected: the address it was created with is its own permanent login ID and works from the start. See Login IDs.
Without a username, the request is refused with EXISTS and E-mail "user@email.com" is already a login ID in this service. when the email is already a login ID another account was granted: the address that account logs in with, or an address it has verified. An email that another account was itself created or invited with, without a username, is the same login ID again and gives User already exists. instead.
With a username, the same E-mail error is given whenever the email is a login ID another account was granted, either as the login ID that account was created or invited with or as its verified email. The username itself is refused only when it is an e-mail address another account was granted that way (Username "jane@email.com" is already a login ID in this service., or The login ID is already used by another account in this service. when the refusal comes from the check made as the account is created). A username that another account was already created or invited with gives User already exists., for example when the same account is created twice. See the createAccount() errors and When a login ID is already taken.
An email login another account holds without having verified the address blocks nothing. It is removed, that account keeps logging in with the login ID it was created with, and your request goes through.
For more detailed information on all the parameters and options available with the createAccount() method.
In the dashboard
Click + Add User on the Users page and keep Create Account selected. Email and Password (at least 6 characters) are required. Username is optional and permanent once set. The other sections fill in the profile, and the Public Visibility checkboxes decide which of those attributes other users can see. Click Create, and the account can log in right away.
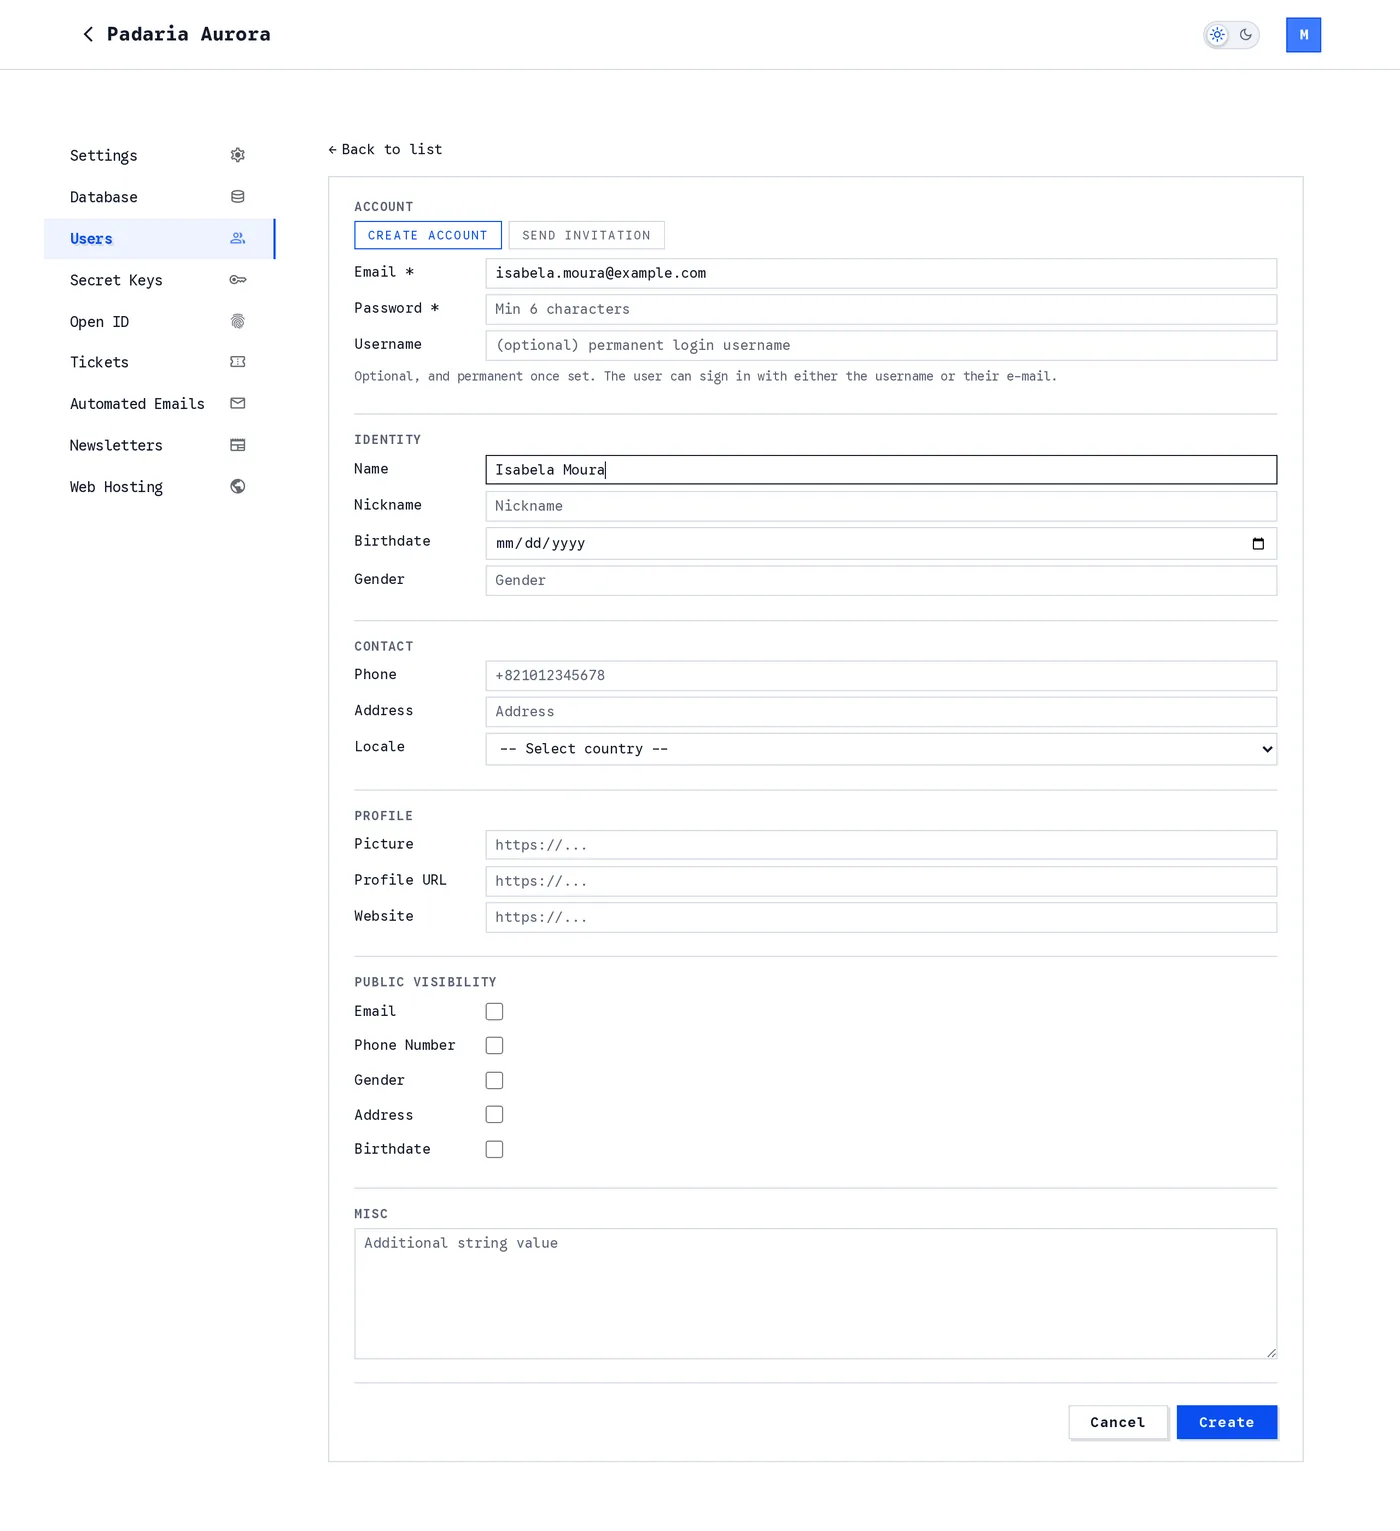
Create Account. The account exists as soon as you click Create, with the password you typed.
Updating User Attributes
Admins can update any user's profile attributes by using the updateUserAttributes() method.
You must provide the target user's user_id, along with at least one attribute to update. Any attribute you omit is left unchanged.
When the request is successful, the string "SUCCESS: User attributes updated." is returned.
<form onsubmit="skapi.updateUserAttributes(event).then(response => console.log(response))">
    <input name="user_id" placeholder="User ID" required/>
    <input name="name" placeholder="Name"/>
    <input name="misc" placeholder="Misc"/>
    <input type="submit" value="Update Attributes" />
</form>skapi.updateUserAttributes(
{
user_id: 'xxx...', // User ID to update.
name: 'New Name',
misc: 'Updated by admin'
},
).then(response => {
console.log(response);
/*
Returns:
"SUCCESS: User attributes updated."
*/
});The updatable attributes are the same profile attributes used in createAccount(): name, email, phone_number, address, gender, birthdate, misc, picture, profile, website, nickname. Not the *_public visibility flags: those are set only when the account is created and are the user's own afterwards; a request that carries one is refused. See Public visibility.
When the change takes effect
An admin's update is written to the user's account right away: the attributes the request carries are stored on the login account the moment the request returns.
What your app reads, though, is the user's record: the profile that getUsers() returns, that the dashboard's Users page lists, and that other users see when they look the user up. The record is a copy of the account that is rewritten each time the user is issued a token, and an admin's update does not issue one. So the record keeps the previous values until the user next logs in, or until the session the user already has renews its token. A token lasts up to a day, and a session renews it on its first request after it expires. From that moment the record carries the new values everywhere.
Until then:
- The Users page shows the new values on the row you edited, but shows the previous values again after a reload, because a reload reads the record.
getUsers(), and every other user's view of the profile, return the previous values.- The user's own session is in the same position:
getProfile()answers from the token the user holds, so the user sees the previous values until that login or renewal, and their ownupdateProfile()in the meantime starts from them.
misc is the one exception: it is written to the record in the same request, so getUsers() and the Users page show the new value at once. The user's own session still catches up at the next login or renewal.
Nothing is lost in between: the account holds the new values, and the next token carries them into the record. When a user has to see an update right away, ask them to log out and log in again.
Changing a user's email takes their email login away
The new address is written unverified, whoever sends the request, the project owner and admins in access group 99 included: this method cannot mark an e-mail address verified. The account's email login is removed in the same request, so no email reaches it until the user verifies the new address with verifyEmail(), and then a few seconds later, on the account's next token rather than in the verifyEmail() response.
The account keeps logging in with its username, or with the address it was created with when it was created without one. The new address stays private until the user makes it public themselves; an admin cannot set email_public. See Login IDs.
Sending the address the account already has, already verified, is not a change: it is left out of the request, and the account keeps its verification and its email login.
An admin in access groups 90 ~ 98 can update only accounts whose access group is lower than their own. Updating an account in the same access group or a higher one is refused with INVALID_REQUEST and No access to modify admin., and nothing in that request is changed. A disabled account counts with the access group it had before it was disabled. The project owner and admins in access group 99 can update every account. See The rank rule.
Nobody updates their own account with this method, the project owner and admins in access group 99 included. Your own user_id is refused with INVALID_REQUEST and Cannot modify attributes of the current user., before anything is read or written. Update your own profile with updateProfile() and no user_id, the same call any user makes.
An email that is already a login ID another account was granted, as the login ID that account was created with or as an address it has verified, is refused with EXISTS and E-mail "user@email.com" is already a login ID in this service., and nothing in that request is changed. An email login another account holds without having verified the address is removed instead, and your request goes through. The server derives the email login from the new address itself. A login username is permanent: no admin method changes it, and a request that tries to set the login handle without an email is refused with INVALID_REQUEST and The login username is permanent and cannot be changed. See updateUserAttributes().
updateProfile() called with another user's user_id sends this same request, so it follows the same rules and gives the same errors. Called with your own user_id it drops the ID and updates your own profile instead, which is the call every user makes.
In the dashboard
Click the account's row on the Users page, edit the fields of the form, and click Update. The row shows the new values at once, and a notice at the bottom of the page reminds you that the change takes effect when the user next logs in: see When the change takes effect.
Deleting User Accounts
Admins can delete user accounts by using the deleteAccount() method.
This example demonstrates using the deleteAccount() method to delete a user account.
When the request is successful, the string "SUCCESS: Account has been deleted." is returned.
skapi.deleteAccount(
    {
        user_id: 'xxx...' // User ID to delete.
    },
).then(response => {
    console.log(response);
    /*
    Returns:
    "SUCCESS: Account has been deleted."
    */
});
WARNING
This action is irreversible. Once an account is deleted, it cannot be recovered. All the user's data will be deleted from the database.
An admin in access groups 90 ~ 98 can delete only accounts whose access group is lower than their own. Any other account is refused with INVALID_REQUEST and No access to modify admin., and nothing is deleted. A disabled account counts with the access group it had before it was disabled. Admins in access group 99 and the project owner can delete any account of the project. See The rank rule.
Passing your own user_id deletes your own account, and is not ranked.
In the dashboard
Tick the accounts on the Users page and click the Delete users icon, or click Delete at the bottom of an account's form. The dialog says how many accounts will be deleted. Click Delete to confirm.
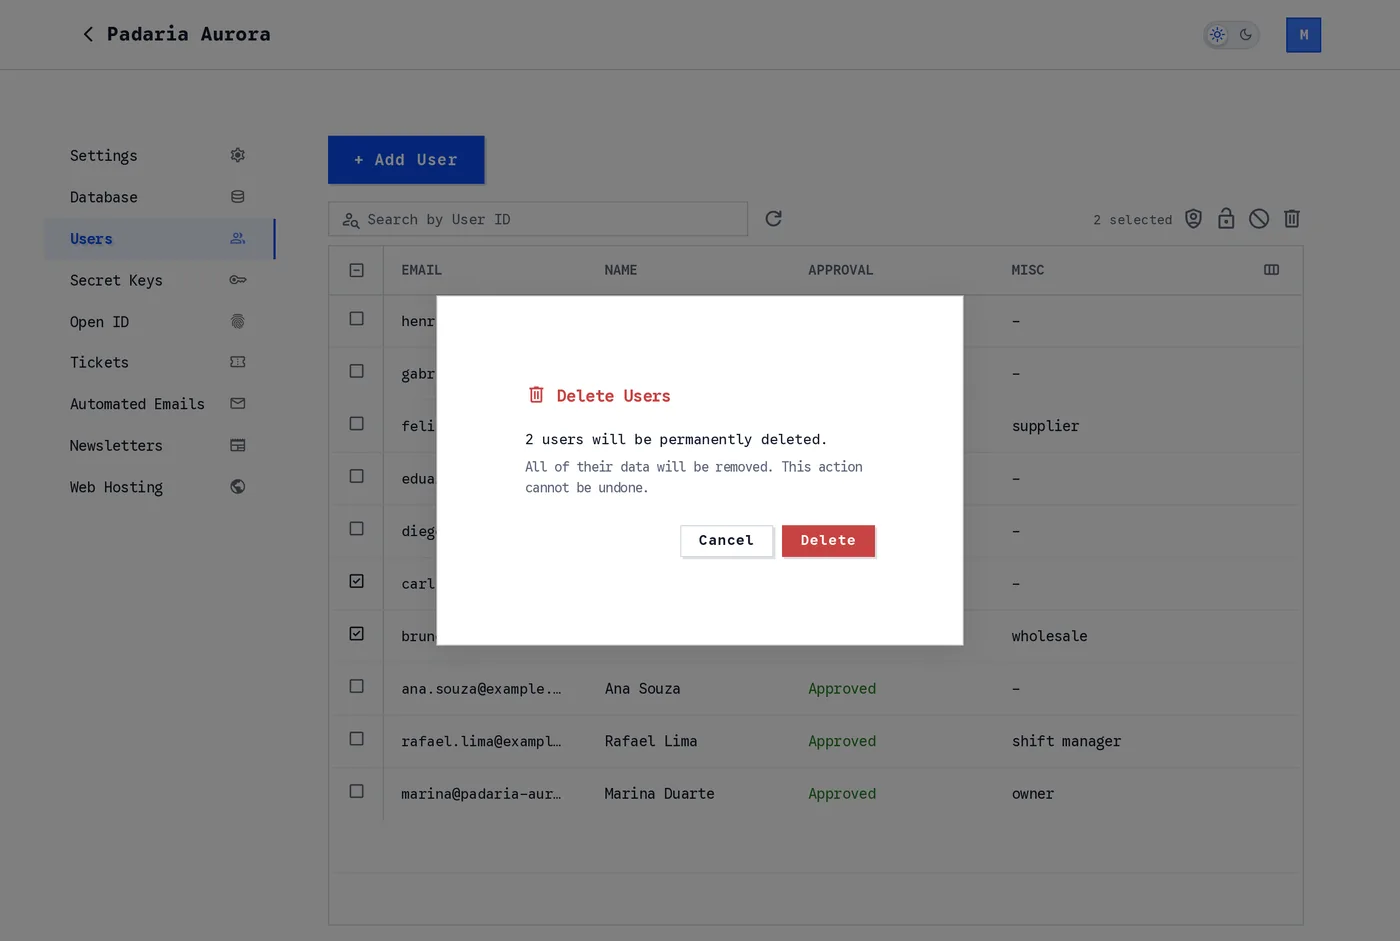
Delete Users. There is no undo.
Blocking User Accounts
Admins can block user accounts by using the blockAccount() method.
This example demonstrates using the blockAccount() method to block a user account.
When the request is successful, the string "SUCCESS: The user has been blocked." is returned.
skapi.blockAccount(
    {
        user_id: 'xxx...' // User ID to block.
    },
).then(response => {
    console.log(response);
    /*
    Returns:
    "SUCCESS: The user has been blocked."
    */
});
Once an account is blocked, the user will not be able to log in to the project.
An admin in access groups 90 ~ 98 can block only accounts whose access group is lower than their own. Any other account is refused with INVALID_REQUEST and No access to modify admin., and nothing is changed. Your own user_id is refused with User cannot block self. See The rank rule.
In the dashboard
Tick the accounts on the Users page, click the Block users icon, then Block. A blocked account shows Suspended in the Approval column. For one account, ticking the Blocked checkbox in the Access section of its form and clicking Update does the same.
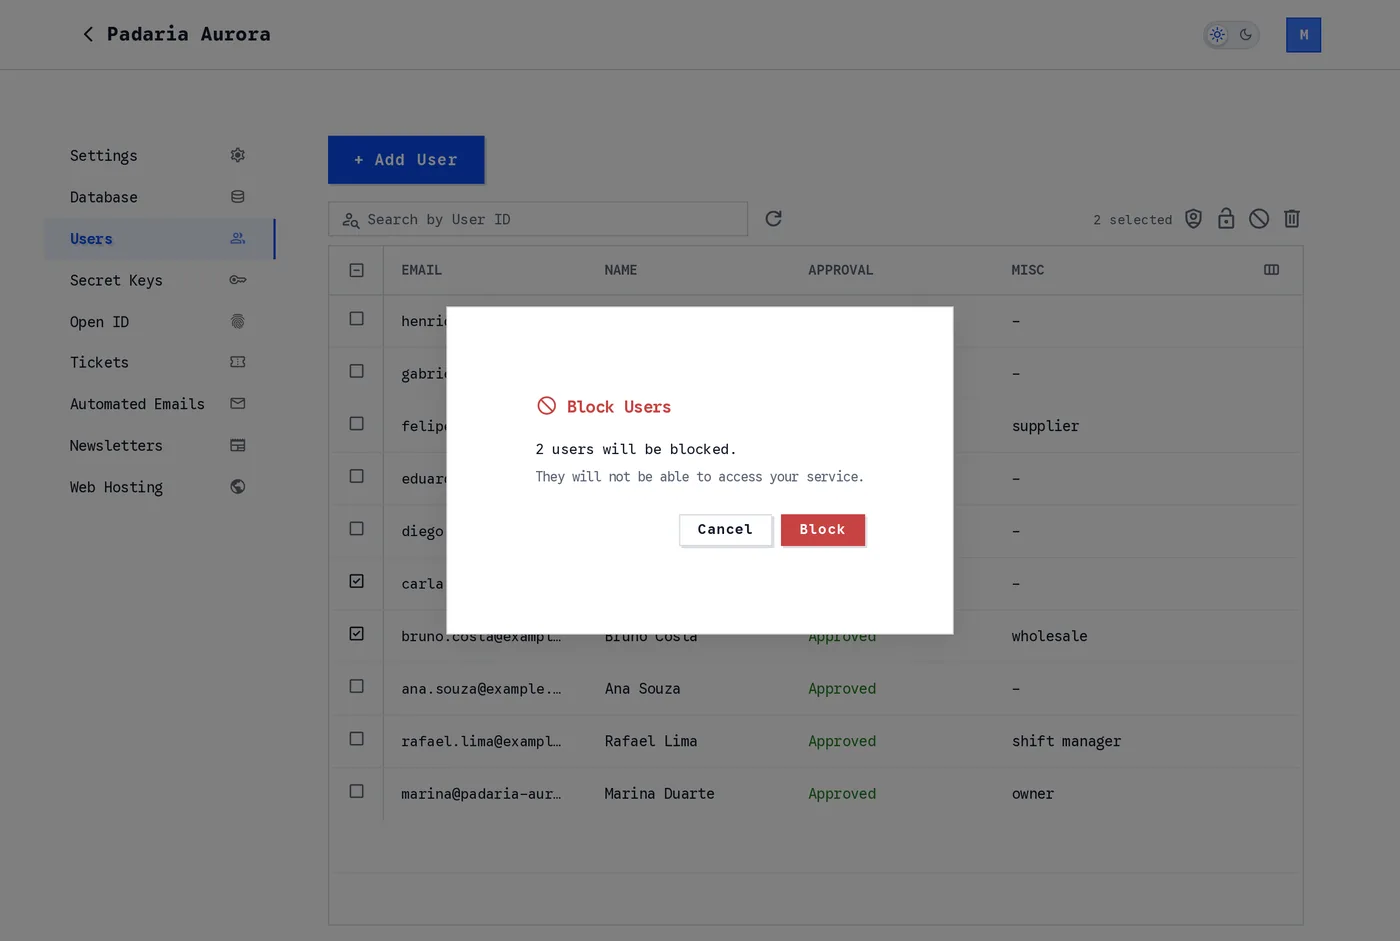
Block Users.
Unblocking User Accounts
Admins can unblock user accounts by using the unblockAccount() method.
This example demonstrates using the unblockAccount() method to unblock a user account.
When the request is successful, the string "SUCCESS: The user has been unblocked." is returned.
skapi.unblockAccount(
    {
        user_id: 'xxx...' // User ID to unblock.
    },
).then(response => {
    console.log(response);
    /*
    Returns:
    "SUCCESS: The user has been unblocked."
    */
});
Unblocking follows the same rule as blocking: an admin in access groups 90 ~ 98 is refused an account in the same access group as their own or a higher one with No access to modify admin., so a lower admin cannot let back in an account a higher admin blocked. Your own user_id is refused with User cannot unblock self.
In the dashboard
Tick the blocked accounts, click the Unblock users icon, then Unblock. For one account, clear the Blocked checkbox in its form and click Update.
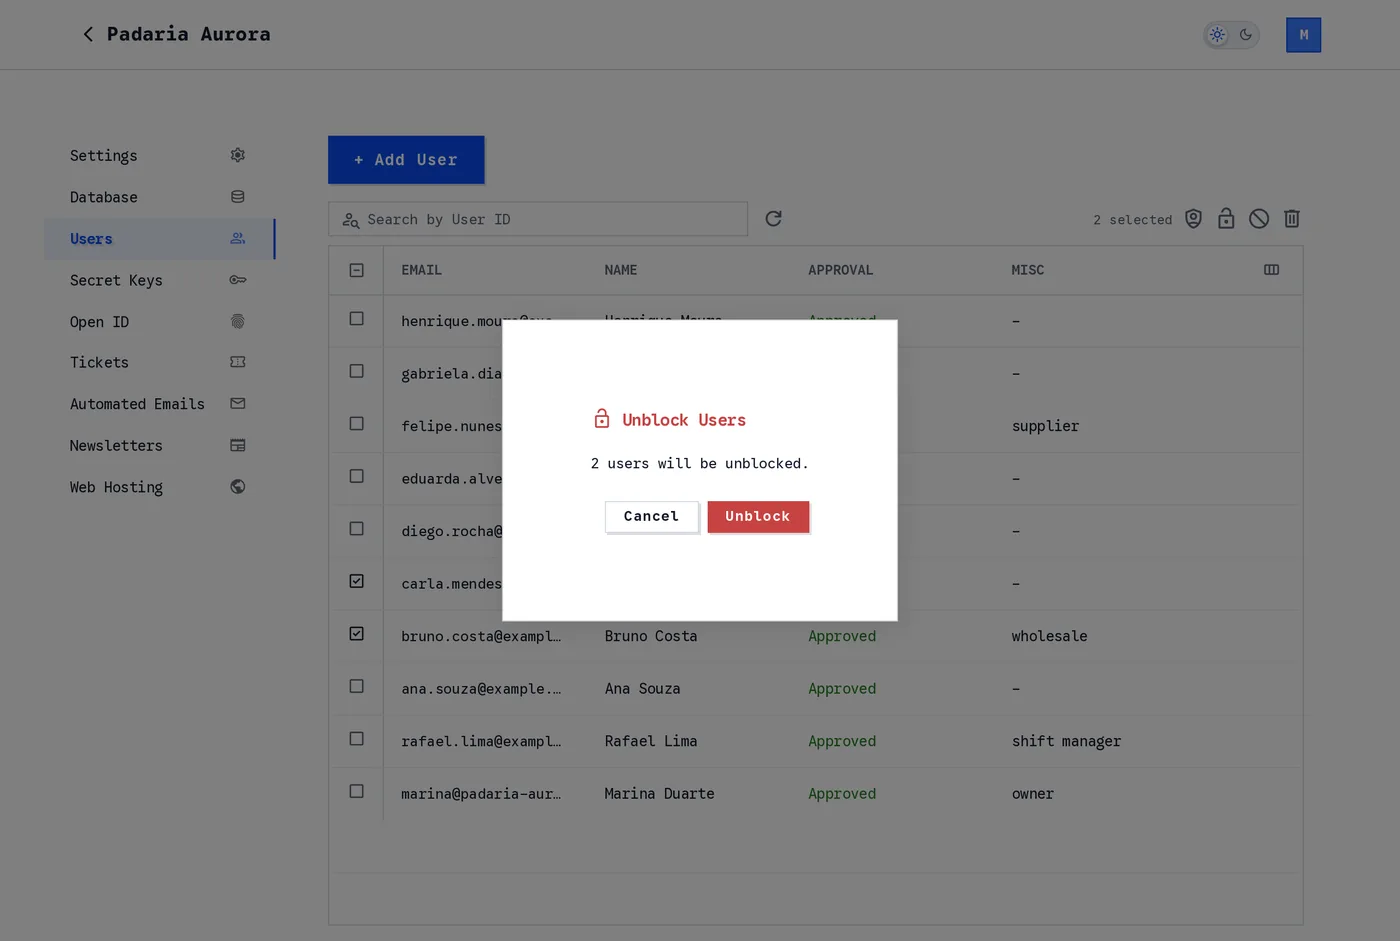
Unblock Users.
For the full policy, including what neither admins nor the project owner can do, see Admin Permissions.